Malto Mario


Feast


The Lady & Sons


1,000 Italian Recipes

Monday, November 26, 2007

Can I Really Bake Bread..*gulp* by Myself?

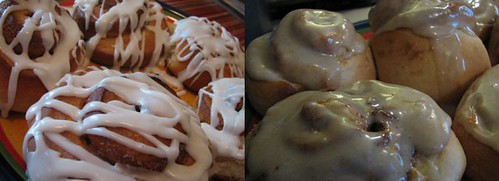
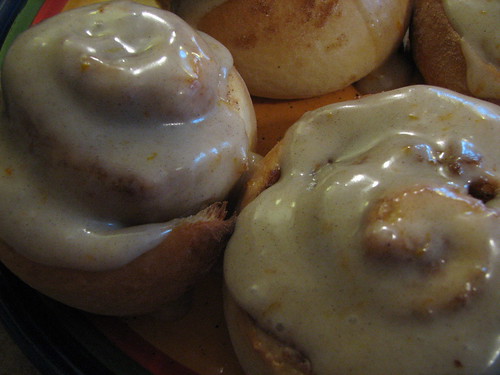
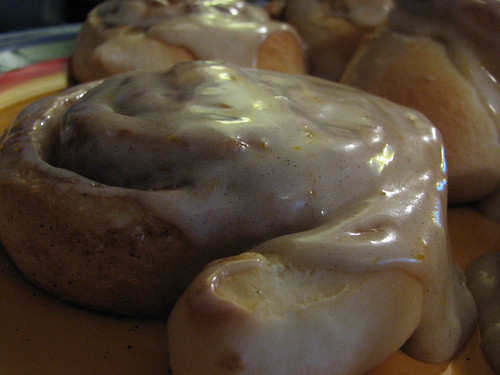
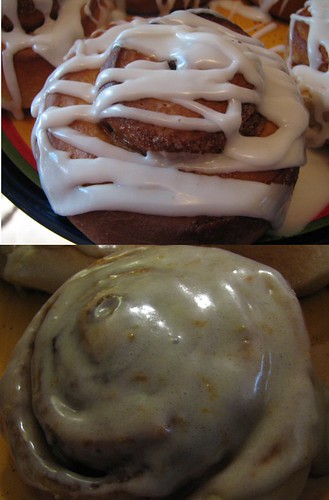
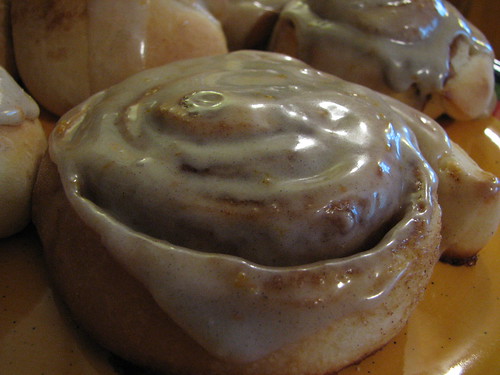
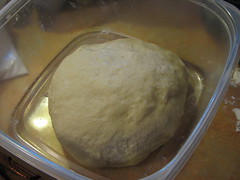
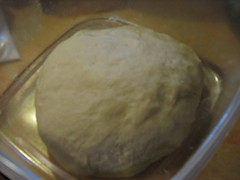
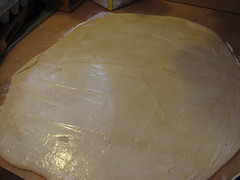
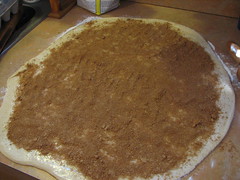
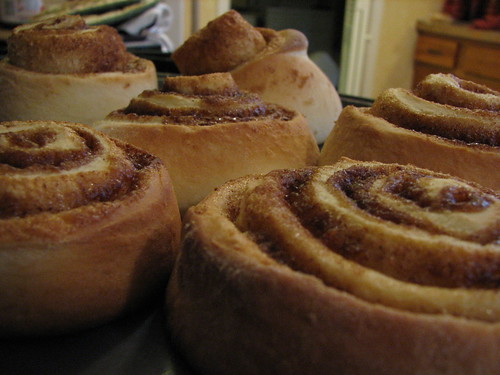
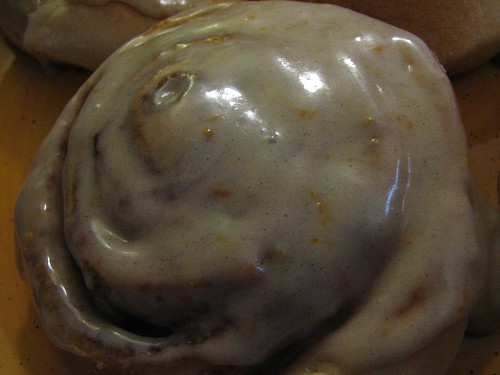
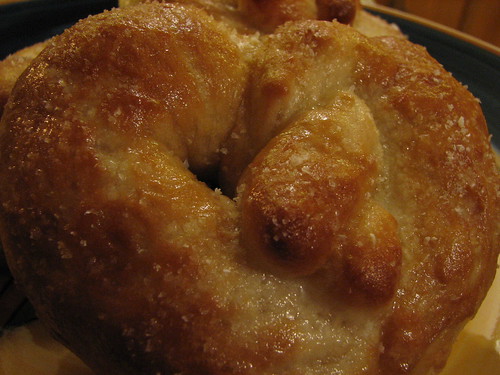
That's what I was thinking pretty much the whole 3 weeks I procrastinated on this challenge. Even though when Helene and Mary were here, they taught me how to do this.. it's not hard! It's just scary! And I really can't pinpoint why.

So this was my very first bread baking on my own.. oh yeah.. this is November's Daring Baker challenge (if you were just dropped down on this planet and didn't realize it. hee!) and frankly, I don't think there could be a better written recipe for me to start off with. I had the jitters, yes. I consulted my guru, most assuredly. But.. I felt confident that I could do this. Mmm hmm.

Potato bread rising Potato bread rising

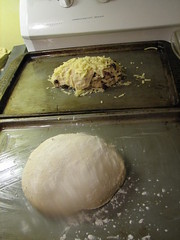
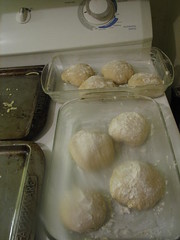
So what was it like? The making of the bread was easy and quite rewarding. I really enjoyed getting my hands in there and kneading the dough (although my shoulders and upper arms weren't as happy) for what seemed like hours. hahahaa! No, it wasn't that bad.. but definitely a skill I need to condition myself for. Yanno, calisthenics, deep breathing exercises, weight training.. har! Okay so I haven't reached that zen place that true bread bakers achieve when they are elbow deep in dough, maybe one day? But, not only was it rewarding that I was making my very own bread.. but this dough also had another great purpose. It gave me 2 extra hands! Yes.. this dough is so sticky that when I needed to grab something, such as a wooden spoon, spatula or my bench scraper all I had to do was lightly waft one of my hands over the object - the sticky dough would suck it right up and hold on to it for me! I kinda felt like a magnet actually.. by the time it was all over, I had kitchen utensils, the recipe, my camera and my dog, Nigel, firmly attached to my appendages.

I decided, since I was so confident, that I'd make 3 different shapes or flavors with the very soft and sticky dough. Which, by the way, was made with bread flour and white whole wheat flour as your Queen of Dorkdum did not have any AP in the house (unbelievable!) and was not venturing out at the crack of dawn to a grocery store. (I KNOW! I broke the damn rules. I am totally going to get yelled at.) I wanted a boule - specifically one that looked like Gracie's. As if. Then I wanted a rustic, free-form shaped loaf flavored with Nicoise olives (Hubbs couldn't find Kalamata olives, which is what I really wanted) and Gruyere cheese. And finally, I wanted rolls for Thanksgiving dinner. Ohhh and by the way, I decided to bake bread for the very first time, by myself, on Thanksgiving morning. You know, when I didn't have to cook/bake all freakin' day long for my family's dinner. NOT. I mean seriously, am I a fakkin glutton for punishment or what?? Well, okay, it wasn't THAT bad.. Hubbs pitted and chopped the olives for me. ;)

Potato bread - Nicoise & Gruyere
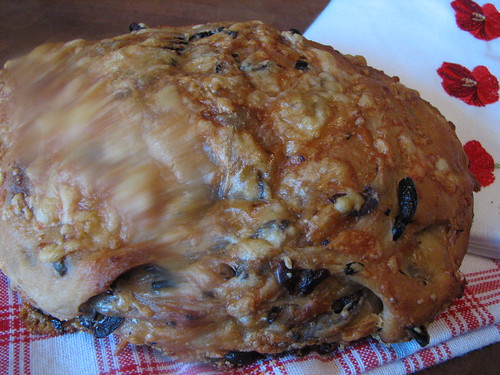
Check out the brand new towels.. aren't they gorgeous? Almost as gorgeous as the gal who gave them to me. :D

Anyhoo.. as I've been saying.. everything went pretty much seamlessly.. UNTIL.. *shudder* until I put my boule and my olive/cheese loaf, on buttered baking sheets, into my smokin' hot 450º F. oven. And when I say, smokin' hot, I mean.. two SMOKING hot, butter burnin' baking sheets.. Oh yeah. And it was the black pillowy kind of smoke. You know, the kind that chokes and sets off the smoke alarm - as well as the built in ventilator on the microwave that's mounted above the oven.. which is louder than the fakkin smoke alarm? GOD. I could not see OR hear for a good half hour.

What does one do when her buttery baking sheets start to smoke? Well she opens the door, and remembers that her guru said there is a hot spot on the right side of the oven. So that is what must be causing the smoke! I'll just move the left baking sheet over to the right and move the right over to the left of the oven and that way I'll make it through the 10 minutes at super high heat without any more smoke! Brilliant!!

Mmmm hmmm...

Yeah.. no, that didn't work. So now I'm opening my oven door for the third time, taking out the smoking and now black charred baking sheets and searching frantically for my pizza stone (hello? She had a stone this whole time??).. sliding the pizza stone in.. running to the pantry to look for cornmeal.. throwin' a handful of it on the pizza stone (oven door open this whole time) and then move my amazingly NOT burnt breads to the stone. Turn the fakkin oven down to 375º, open the door a FOURTH time, and spritz a lil water in there for good measure.

People! I should NOT be left alone in a kitchen with a 450º oven!!!!

Potato bread - Boule
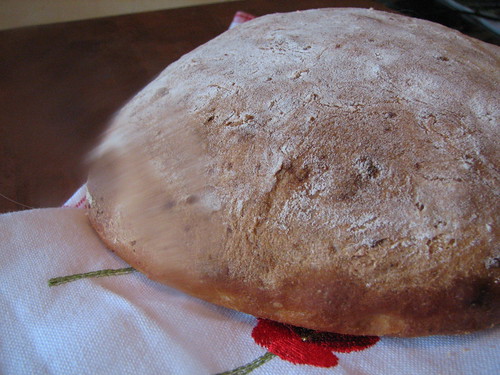
She looks puffy here, but that's only because my camera lens was a centimeter away. hee!

So my nice round and puffy boule? Well she ended up being a disc. Yeah, well what did I expect, eh? The olive/cheese bread turned out beautifully though - although I put way too many olives in it, so it was quite salty.. which I didn't like, but the rest of my family loved it. I gotta tell ya though.. the Gruyere was AMAZING in this bread.. I will make a Gruyere only loaf as one of my loaves next time.

Potato Buns

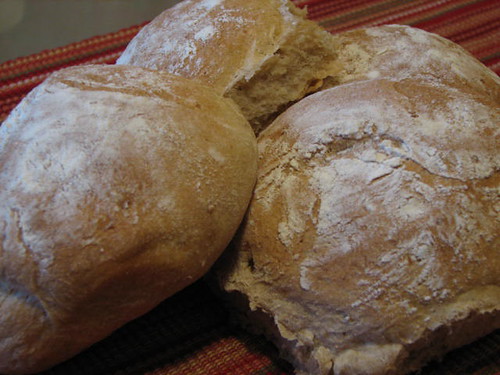
The rolls were next and they were baked in two buttered Pyrex baking dishes. They turned out beautifully in shape, height and color - with no smoking!

What'd I think about the final product? Well.. unfortunately, this wasn't the bread for me. I was really hoping for a chewier crust and I did not like how the crumb was so "tight", if that's a correct term? I prefer breads like Italian and French or even the No Knead bread, where there are nice open holes as opposed to a bread like commercially baked sandwich breads. Do you know what I mean?

I also know that the opening/closing of the oven door and the use of bread flour and white whole wheat flour played a major factor in my bread not turning out the way I had hoped. Not to mention, my family loved all 3 - I was the only one who was disappointed. So this weekend, in between running here and there, I stopped in to the local mega mart and stocked up on AP flour and more yeast - as well as Kalamata olives, roasted garlic and sun-dried tomatoes - this bread will be made again, this time with the correct flours and the knowledge learned that buttered, metal sheet pans aren't exactly the best way to go when baking something in a high temp oven. Sheesh.

Potato bread Potato bread - Nicoise & Gruyere
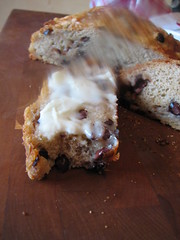
Hi! I'm the Smudge! Am I driving you crazy yet??

Did I mention that this month's hostess is a gal who I hold close to my heart? Tanna of My Kitchen in Half Cups decided on this recipe and she did a most excellent job helping everyone out throughout the month. Thank you SO MUCH Tanna! You were a fabulous hostess and I for one, was more than happy when I saw you had chosen bread.. I was hoping someone would soon and I got my wish. =) xoxo

Well all I can say now is.. there's plenty of reading and drooling available regarding this recipe - check out the ever growing Daring Baker Official Blogroll and enjoy the trip!

PS - I almost forgot to mention!!! I was TRAUMATICALLY WOUNDED that day! I can not say for sure this horrible event happened while making my bread or while making the various yummies for Turkey Day dinner.. as I did not even realize it happened until the flap of skin (ewww.. sorry) caught on a dish towel. Here is my photographic proof that maybe I'm not the best person to cook with on a day when I've got numerous items in the oven, the mixer, the cutting board, the fridge, etc. Say a prayer that my thumb will live through this. Please.

My wound My wound
My silhouetted wound
The silhouette of my wounded thumb in front of my monitor as I was talking with Helene and Marce on Yahoo.. we may or may not have been discussing a very disgusting (ewwwwwwwwwwwwwwwwwwwwwwwwwwww) topic at the time.
No. I will not tell you what it was. :P

xoxo

Labels: , ,

Saturday, November 24, 2007

Reinhart vs. Cinnabon™ - The Smack Down!

After our Daring Baker September challenge of cinnamon rolls and sticky buns, hosted by the most lovely Marce of Pip in the City.. a few of us gals started talking about what kind of differences the hugely popular commercial Cinnabon™ cinnamon rolls had vs. the outstanding cinnamon rolls we made from Peter Reinhart's The Bread Baker's Apprentice.


ReinVsCinn2
Reinhart's on left / Cinnabon™ knock-off on right


It was mostly unanimous that the Cinnabon™ rolls were a bit more ooey-gooey and the icing was about 10,000 times better as they use cream cheese in their icing. Well the next thing you know, some dork suggested we make the Cinnabons™ so we could compare.

And so we - and by we, I mean moi, Marce, Helene, Sara, Kelly, Laura Rebecca, Chris and Mary got baking last Sunday. Now you'd think that since we've all made cinnamon rolls in the past, that this baking session would go smoothly.. but uhh.. not so much.


Cinnabon cinnamon buns


Well everyone's buns baking went smoothly, I don't think anyone had a problem, the dough was delightful and the icing was as easy to whip up as the icing in Reinhart's tome. But the actual act of getting together on Yahoo Instant Messenger to lend support and chit chat through most of the process didn't go quite as well..

Firstly there's the part where we forgot to tell everyone to meet on Yahoo.. *sigh* So some bakers weren't there to witness the HELL we went through trying to get Kelly online with us. GAWD. You know? As far as I know, Kelly might still be baking these damn rolls today. We spent most of the day (during rise times) trying to get her Mac to behave and join us in a conference on Yahoo. It never happened. By the time we were all enjoying warm ooey gooey Cinnabon™ knock-off's, Kelly was still at her Mac installing and uninstalling various versions of Yahoo IM. Also? She was trying to make U-Stream work - as she wanted to allow us to see her bake the rolls..


Cinnabon cinnamon buns


She did, finally, succeed in that - and a few of the gals got to watch her in her kitchen making cinnamon rolls. I was not a part of that. *sob* I heard it was very funny though.. and I can just imagine Ms. Sexy Thang getting her groove one amidst puffs of flour and schmears of cream cheese. ;)

No.. the Queen of Dorkdum, could not participate in the fun video-blogging. For she remembered how she had forgot to make her pretzels for her anniversary post the following day. Are we seeing a theme here? Forgetting to let everyone know about Yahoo and then forgetting one of my most important posts of the year needed to not only be written up but actually BAKED? Ugh. So I rushed off to throw together more yeast and flour while the other gals watched Kel.


ReinVsCinn1
Reinhart on top / Cinnabon™ on bottom


Okay.. so what was the verdict of our Cinnabons™ vs. Reinhart's rolls? We all agreed that although Reinhart's rolls were completely delish, the Cinnabons™ ended up being a lil more gooey-er in the middle and the Cinnabon™ icing, totally blew the Reinhart icing out of the water, so to speak.

Which would I make again? Most likely the Cinnabon™ variety. I really liked how the filling was butter/brown sugar/cinnamon and yeah, that icing was good enough to eat with a spoon. I even added cardamom and orange zest to my icing so it was that much more heavenly. Still though, I can say - that these did not turn out exactly like a real Cinnabon™.. the recipe was a knock off that I paid a whole .79¢ for.. so I knew it wouldn't be 100% authentic, but they were close. I have yet to master the art of making those huge tiered cinnamon rolls though.. mine usually end up more disc like. I get a good rise in my dough, but when I roll them and slice them, the middle doesn't rise above the rest as much as Cinnabon's™ rolls do. There must be a trick there that I am unaware of?


Cinnabon cinnamon buns


Anyhoo.. it was a blast chatting with the gals all day as well as calling my sweet Kel on the phone to hear the desperation in her voice while she was trying to make fakkin Yahoo work. hahahahaaaaa! If we've learned anything from this experience.. it's A- butter will make ANYTHING better and B- next time find a chat platform that works with a Mac first. ;)

If you'd like to do your own comparison, you can find Reinhart's recipe on Marce's site here and the Cinnabon™ knock-off recipe below. Note my horror at the thought of using margarine. But that's what the original recipe calls for and I'm sure there is a reason as I know butter and margarine don't cook/bake the same, but I just couldn't go there.

Cinnabon™ Knock-off Cinnamon Rolls

Rolls:


1 pkg. active dry yeast (1/4 oz. size or 2 1/4 tsp.)
1 c. warm milk (105º to 110º F.)
1/2 c. granulated sugar
1/3 c. margarine, melted (ewww - I’m using butter!) :P
1 tsp. salt
2 eggs
4 c. all-purpose flour

Filling:

1 c. packed brown sugar
2 1/2 TBS. cinnamon
1/3 c. margarine, softened (ewww – see above!) :P

Icing:

1/4 c. (1/2 stick) margarine, softened (again ewwwww) :P
1/4 c. (2 oz.) cream cheese, softened
1 1/2 c. powdered sugar
1 TBS. whole milk (I ended up using about 4 TBS. to get consistency that I wanted.)
1/4 tsp. vanilla
1/8 tsp. lemon extract

Instructions:

  1. For the rolls, dissolve the yeast in the warm milk in a large bowl
  2. Mix together the sugar, BUTTER, salt & eggs. Add flour and mix well
  3. Knead the dough into a large ball, using your hands lightly dusted with flour. Put in a bowl, cover, and let rise in a warm place about an hour or until the dough has doubled in size.

Cinnabon cinnamon buns Cinnabon cinnamon buns


  1. Roll the dough out on a lightly floured surface. Roll the dough flat until it is approximately 21 inches long and 16 inches wide. It should be about ¼ inch thick.
  2. Preheat oven to 400º F.
  3. For the filling, combine the brown sugar and cinnamon in a bowl. Spread the softened BUTTER evenly over the surface of the dough, and then sprinkle the cinnamon-sugar evenly over the surface.

Cinnabon cinnamon buns Cinnabon cinnamon buns


  1. Working carefully from the top (a 21 inch side), roll the dough down to the bottom edge.
  2. Cut the rolled dough into 1 ¾ inch slices and place 6 at a time, evenly spaced, in a lightly greased baking pan. Let the rolls rise again until doubled in size (about 30 min.). Bake for 10 minutes, or until golden on top.

Cinnabon cinnamon buns


  1. While the rolls bake, make the icing by mixing the BUTTER and cream cheese in a large bowl with an electric mixer on high speed. Add the powdered sugar and mix on low speed until the sugar is incorporated, then add the milk and flavorings. Mix on high speed again until the icing is smooth and fluffy.
  2. When the rolls come out of the oven, let them cool for about 10 minutes, then coat generously with the icing.

Cinnabon cinnamon buns

Freezing: These rolls can be frozen after baking. Just pop one into the microwave for 20 to 30 seconds to reheat. So says the recipe.. I’d still freeze after the first rise and cutting/shaping.

xoxo

Labels: , ,

Monday, November 19, 2007

Baby's First Birthday!

No, I haven't been hiding any offspring from yous. =)

The title to this post refers to none other than our Daring Bakers group of the most talented bakers in the world! Today we are One Year Old!

Yep, one year ago, my beautiful partner in crime, Ivonne, and I were discussing recipes that we'd always wanted to try, but didn't really feel comfortable doing so. Basically, we were either kind of afraid to try these recipes or we'd always wanted to try them but they just never made it to the top of our baking list. So many recipes.. so little time. Yous know the feeling, right? =)

One day we were talking about our love of soft pretzels and how neither of us had attempted baking them ourselves. "How hard could it be?", we asked each other. "Well let's find out!" and that started the ball rolling. Initially we both found recipes we wanted to try, and again with more discussion, we decided that the way to go would be to bake the same exact recipe as written. This way, if we ran into problems, we could lean on each other for support as we would both be "on the same page", if you will. And lemme tell you.. it worked. We both did lean on each other at certain stages of the recipe and we walked each other through. After a few hours, we were both enjoying some nice warm and chewy pretzels.

We then decided to take it a step further and picked a day we'd blog about these pretzels of ours. And so we did.. each of us writing about our individual experience in baking them, as well as our "team effort" experience when having to lean on each other. Both posts were about the exact same recipe, but both posts were extremely different - both in the look of our final products, and with what we thought about the overall recipe.

The response was just amazing. We were immediately chastised for not asking a few friends who would have liked to bake pretzels with us. heee! So we invited them to join us in a new recipe the following month.. Biscotti! That went over quite well too - and we knew this because we were chastised from a couple other friends who wanted to bake with us. *grin* And then well.. I guess you can say, the chastising stopped but the interest in joining up with us continued.. and grew.. and continued.. and ga-rew.. Not including those new members who will join in on the fun in December, we've got OVER 300 members. I would not be surprised if we hit the FOUR HUNDRED mark in December either. =)

Now who would have thought that a simple recipe for soft pretzels, made by two friends in two different countries and then blogged about on two different blogs would amount to the Daring Bakers just a few short months later? Not I. Not Ivonne. But it did and here we are.. happy as could be and learning more and more with each passing day.

Wanna come have fun with us and learn all kinds of tips and tricks about baking? Ever been scared to play with hot caramel and puff pastry? Envision yourself building a 2 foot crepe cake? How about learning the fine art of achieving the correct ratio of cream cheese frosting to red velvet cake? Care to walk on the wild side and chance death by chocolate? Wait! Wait! I know! You'd much rather dip a toe into a warm and inviting pool of caramel and chocolate, wouldn't you?

We'd love to have you, that's for sure.. and all we ask is that you complete 8 out of 12 challenges during your calendar year and you can't miss 2 in a row, without a reasonable excuse. You must follow the recipe exactly, except for our 4 exclusions which are:


  1. If you, or anyone that will eat (or come into contact with) the challenge recipe is allergic to any of the ingredients, you may substitute those ingredients with something you aren't allergic to - but try to use something that's comparable to the original ingredient. This exclusion also goes for lactose intolerance, vegan lifestyles, gluten-free lifestyles and other health issues.
  2. If you can't find the ingredient easily where you live, you may substitute another ingredient, but try to use something that's comparable.
  3. If an ingredient is expensive - you do not have to use it. You can leave it out if it's not an integral part of the recipe, or you may substitute it with another ingredient as long as you stay within the spirit of the recipe.
  4. The hostess/host may allow as many or as few changes within the ingredients and technique of the recipe.

And finally.. you have to promise to keep the recipe and challenge date a secret from the rest of the blogosphere! That's right.. we love surprising all the wonderful people who enjoy reading these posts. And hey, it makes us feel like the spy agent bakers that our logo portrays us as! heeee!

Sound good? Then send both myself {lamiacucina67[@]gmail[.]com} and Ivonne {creampuffsinvenice[@]gmail[.]com} an e-mail with your name, blog name and blog address. Not a blogger? No problem! Send us an e-mail with your name and you're in! But! We still expect you to bake the challenge and join in on the fun like the rest of us.. this includes a write up, consisting of a couple paragraphs, of your experience and what you thought about the recipe.. and if at all possible, take a few digital photos.. then send it all in to us at least 48 hours before the post date. We'll get it posted on our new Daring Baker Non-Blogging Members Blog on the post date.

Okay so I need to get a lil mooshie.. ya'll knew I couldn't end this without the moosh, right?

Ivonne.. thank you for putting up with my ca-rasszzzyyyy over-thinking skilz, my OCD when it comes to organizing this group of gorgeous men and women, for listening to my shite and for talking me down - always for the talking of me down. ha! You are an inspiration to me and I am forever grateful that I worked up the nerve to e-mail you way back in April of 2006 hoping you'd have a calamari sauce recipe. hahahahaaaaa! Well you didn't, but I got something so much more important - our friendship, which I hope will continue until we are lil, wrinkly, old Italian women. ;)

Mary, Veronica and Helene- thank you for everything you all do to keep our group running and our blog in tip top shape! Your help and friendship are never over-looked nor under appreciated, always know that. :)

Okay enough with the moosh! heeee!

As a way to celebrate our 1 year birthday, Ivonne and I thought it'd be fun to revisit the pretzel.. only this time, we'd each pick a different recipe just for shites and giggles! Ivonne chose a mouth watering lil pistachio pretzel cookie that she makes each year and I chose to stick with the soft pretzels, baking a traditional pretzel and a stuffed pretzel! Yum!

Happy Birthday Daring Bakers!

xoxo

Pretzels a year later!
Soft Pretzels

1 1/2 c. lukewarm water
2 1/4 tsp. active dry yeast
2 TBS. brown sugar
1 1/4 tsp. salt
1 c. bread flour
3 c. all purpose flour
4 c. water
4 TBS. baking soda
coarse salt to sprinkle on pretzels
2 to 4 TBS. butter, melted

Preheat oven to 450º F. Lightly grease 2 cookie sheets or jelly roll pans.

Sprinkle yeast on lukewarm water in mixing bowl and stir to dissolve. Let stand for 5 minutes. Add brown sugar and salt stirring to dissolve.

Into the bowl of a mixer, add flour. Using the paddle attachment on low speed, mix the flour and drizzle the yeast mixture into the bowl. Beat until the dough forms a ball, then change to the dough hook attachment and knead until dough is smooth and elastic, about 5 minutes. Alternately, you can do this by hand, kneading for roughly 10 minutes.

Place dough into a greased bowl and allow to rise for at least 1/2 hour in a dry, warm place. (I either use the inside of my oven [TURNED OFF] with the light on, or I put the bowl on top of my dryer while I'm drying clothes.)

While the dough is rising, prepare a baking soda water bath with 4 cups warm water and 4 TBS. baking soda stirring often until baking soda is completely dissolved.

After dough has risen, pinch off bits of dough and roll into a long rope (about 1/2 inch or less thick) and twist into desired pretzel shape.

Once shaped, dip the pretzel in the soda solution and place on a greased baking sheet. Allow pretzels to rise again - I let mine go about 15 minutes or so.

Pretzels a year later!

Bake in the prepared oven for 10 minutes or until golden. Brush with melted butter and sprinkle coarse salt over them or you can use any herb or topping of your choice on the buttered pretzels. Sesame seeds work well, as does cracked black pepper. A great sweet topping is cinnamon sugar.. chocolate doesn't hurt either. ;)

Variations:

Pretzels a year later!

For stuffed pretzels - prepare your choice of filling. In this recipe, I used:

4 oz. cream cheese, softened
1 1/2 c. confectioners' sugar

Beat well with wooden spoon until a thick frosting/filling forms.

Pinch off a hunk of the dough, and roughly shape into a short log. Using a rolling pin, roll the log flat and then pipe the filling down the middle. I left about an inch of dough on each side. Starting at the ends, fold dough over about 1/2 inch of the filling and pinch sides shut. Then fold one side of the dough over the filling and pinch together with other side - making sure no filling is peeking out, what you get is an eggroll shape. Place the logs, seam side down on a greased cookie sheet. Bake in prepared oven for 10 minutes or until golden. Once they come out, brush with butter and then roll in cinnamon sugar.

Pretzels a year later!

xoxo

Labels: ,

Friday, November 16, 2007

Gracie Hassa House!

And Lisee is blogging twice in one week! Mark your calendars, kids. ;)

So since I live allllll the way on the other side of the country from my lil Gracie, I can't attend her house warming party. *sniff* Actually, a lot of Gracie's blogging friends don't live near enough to go make a personal visit, so she came up with a perfect idea - a virtual house warming party! Everyone is invited to go check out her new digs and everyone is bringing a dish. Now that's my kinda party. :D

As soon as I read her invitation, I knew exactly what I was bringing. I have made this dish several times now and I can tell you with 100% honesty, if you see that I've made it you better get yourself some ASAP because I have a HUGE problem with sharing this stuff. I made it for my birthday party last week and I begrudgingly allowed my guests to take small slices home. And then I finished the leftovers (little more than 1/4 pan) THE NEXT DAY. I shite you not. *slurp*

and *burp* ('scuse me)

What dish am I talking about? Baked Spaghetti people!

I found this recipe on Recipezaar and chose it because there was cream of mushroom soup in it. *gasp!* I know you are saying, "Cream of mushroom soup??? WTF??" Well, I've made many baked spaghetti dinners in the past, including a recipe that came from the mother of my babies (I wish), The Queen of Butter Guzzlin', Paula Deen. And her version doesn't come close to this. Forgive me, Paula!!

Well here.. look:

Spaghetti Pie

Didn't I tell you?? Can you see the layers? Can you see the ooey gooey cheese? Can you JUST IMAGINE this with a garden salad and a nice garlic roll? I've left napkins on the table to your left - I'll wait while you mop up that drool runnin' down your chins. Helene honey? Take 2. =)

Spaghetti Pie

Super easy to put together, it makes a lot and it's as delish the next day (if not better) than the night you serve it. It's the perfect potluck dish and I can not recommend it highly enough. Try to look past the mushroom soup if it squicks you or makes your blood pressure soar with the amount of sodium in it.. buy the fat free/low sodium kind if you must, but don't leave it out.

Below is the recipe with my changes. If you'd like to make it as it's written on Recipezaar, go here.

Spaghetti Pie
Baked Spaghetti

Serves 10
(9 people served themselves some big portions and some went back for seconds and I still had a little more than 1/4 of a 9" x 13" left over.)

1/2 c. chopped onions
1 c. chopped green peppers
1 TBS. olive oil
2 to 3 c. of your favorite marinara sauce
1 (4 oz.) can mushroom slices
1 (2 oz.) can sliced ripe olives
2 tsp. oregano
1 1/2 lb. ground beef, brown and drain
1 lb. spaghetti, cooked al dente (You'll be baking it too, so don't boil for too long) and drained
1 wedge (1/2 lb.?) of Fontina cheese, sliced (Italian Fontina, it's semi-soft and melts perfectly.)
Or any other good melting cheese - mozzarella would certainly be just as good.
1 (10 oz.) can cream of mushroom soup (using fat free or low sodium would be fine)
1/4 c. water
1/2 c. grated Pecorino Romano or Asiago

Preheat oven to 350º F.

In a large skillet, saute the onion and green pepper in olive oil until soft, then add the ground beef and cook until browned. Add mushrooms, olives, oregano and enough marinara to coat it all. You want it saucy, but not swimming in marinara.

Simmer for 10 minutes.

In a large bowl, combine 1 - 1/2 c. of marinara with the al dente spaghetti - again, you want enough sauce to coat it, but not so much that the spaghetti is swimming in it.

Place half of the sauced spaghetti in a greased 13" x 9" x 2" baking pan (I use Mazola cooking spray). Top with half the meatsauce. Layer half of the sliced Fontina over the meatsauce. Repeat layers.

Mix soup and water until smooth; pour over casserole. Sprinkle with Romano cheese.

Bake, covered, at 350º F for 25-30 minutes, until heated through, remove foil and bake another 5 minutes, or until top has started to turn goldeny brown and delicious.

My Notes: Depending on what kind of marinara you use, you might have to season the meatsauce with salt and pepper. I don't need to season with mine so I didn't add S&P to the recipe. I like to serve with a bowl of extra sauce so everyone can spoon extra over the top if they'd like.

Spaghetti Pie

Okay, well I'm off to the party! I'll be the one standing over her dish doling out very thin slices. :P

What will YOU be bringing?

Congrats Gracie! Love you!

xoxo

Labels: , ,

Monday, November 12, 2007

*tap* *tap* Is This Thing On?

What the hell is wrong with me?? Where the hell have I been?? Is the love affair with my blog waning? Am I getting that 7 year itch 5 years early? Have I stopped cooking and/or baking? I mean, seriously, WTF?

I don't have a good answer. I've got at least 4 recipes I'd like to share, but the thought of sitting down and writing about them hasn't been a priority for me lately.. and really, I don't know why so much. Lots of little things, I guess?

Anyhoo, I'm hoping that my leave of absense (of sorts) is over and that I'll fall right back into my normal groove.. at least an update once a week for cryin' out loud. Hopefully more though. ;)

Have you missed me???? Ya'll had better of missed me. Yeah.. I'm looking at YOU.

Okay well the first recipe I want to share has probably gone around the foodie blog circuit many a-times. It's an Ina Garten (Barefoot Contessa) recipe. Her Beef Bourguignon. Holy cow. I'm pretty sure she is known for her take on this classic French dish, and she should be.. it was.. delectable.

This is a very easy stew to put together and there aren't any fancy tricks or techniques to making melt in your mouth beef & veggies in a delicious gravy - but for me it was an awe inspiring occasion as this Beef Bourguignon was the recipe I chose to christen my brand spankin' new 4 quart cast iron dutch oven. WOOT! If you people had any idea how badly I've wanted one (all) of these things, you'd be shocked. Or maybe you'd be shocked because no matter how badly I've wanted one, and even if I could afford one.. I refused to spend $200.00 on a Le Creuset dutch oven. I know! I know.. the money is well worth it.. they last forever and a day.. I know all of this, but still just the thought of laying down close to a car payment for a pot.. *shudder*

Well on our last day together, Helene and I (after dropping Mary off at the airport) decided to go see what Crate and Barrel had to offer.. you know, I always poo-poo this store - over priced crap! But what I never remember is that every time I've went in, I've managed to find the deal of the year. And their stuff really isn't crap - I'm just jealous that I don't have a $500 a month budget for kitchen gadgets & equipment, dinnerware, glasses and oh anything else that sends me in delicious shivers as I imagine how good it'd look in my wee kitchen.

And imagine my complete shock and utter delight when I found a Mario Batali cast iron, enamel coated, 4 quart dutch oven in a shade of red that matched my kitchen walls perfectly? 'kay now imagine how I peed my pants when I saw it was over 50% off - and I got the thing for $59.99!! Yes, Kmart shoppers - I found the blue light special!!! Le Creuset Le Schmeuset :P

Here.. drool with me!

My new pride and joy =)
Oh how I love you little Mario Batali Dutch Oven *smooches*

Oh yeah, I totally believe that my Beef Bourguignon tasted that much better all because of my new Dutch oven! squeeeeeeeeeeeeeeeeeeeeee!

Beef Bourguignonne
Beef Bourguignon
Courtesy of Ina Garten and FoodTV

Serves 6

Mise en place Beef Bourguignonne Mise en Place Beef Bourguignonne

1 tablespoon good olive oil
8 ounces dry cured center cut applewood smoked bacon, diced
2 1/2 pounds chuck beef cut into 1-inch cubes
Kosher salt
Freshly ground black pepper
1 pound carrots, sliced diagonally into 1-inch chunks
2 yellow onions, sliced (I used 1 lg. Spanish onion)
2 teaspoons chopped garlic (2 cloves)
1/2 cup Cognac (I omitted)
1 (750 ml.) bottle good dry red wine such as Cote du Rhone or Pinot Noir (I went with Pinot Noir)
1 can (2 cups) beef broth (I went with beef stock)
1 tablespoon tomato paste
1 teaspoon fresh thyme leaves (1/2 teaspoon dried)
4 tablespoons unsalted butter at room temperature, divided
3 tablespoons all-purpose flour
1 pound frozen whole onions
1 pound fresh mushrooms stems discarded, caps thickly sliced

For serving:

Country bread or Sour Dough, toasted or grilled and rubbed with garlic clove
1/2 cup chopped fresh parsley, optional

Preheat the oven to 250 degrees F.

Beef Bourguignonne Beef Bourguignonne

Heat the olive oil in a large Dutch oven. Add the bacon and cook over medium heat for 10 minutes, stirring occasionally, until the bacon is lightly browned. Remove the bacon with a slotted spoon to a large plate.

Beef Bourguignonne

Dry the beef cubes with paper towels and then sprinkle them with salt and pepper. In batches in single layers, sear the beef in the hot oil for 3 to 5 minutes, turning to brown on all sides. Remove the seared cubes to the plate with the bacon and continue searing until all the beef is browned. Set aside.

Beef Bourguignonne Beef Bourguignonne

Toss the carrots, and onions, 1 tablespoon of salt and 2 teaspoons of pepper in the fat in the pan and cook for 10 to 15 minutes, stirring occasionally, until the onions are lightly browned. Add the garlic and cook for 1 more minute. Add the Cognac, stand back, and ignite with a match to burn off the alcohol. Put the meat and bacon back into the pot with the juices. Add the bottle of wine plus enough beef broth to almost cover the meat. Add the tomato paste and thyme. Bring to a simmer, cover the pot with a tight-fitting lid and place it in the oven for about 1 1/4 hours or until the meat and vegetables are very tender when pierced with a fork.

Beef Bourguignonne Beef Bourguignonne
Beef Bourguignonne

Combine 2 tablespoons of butter and the flour with a fork and stir into the stew. Add the frozen onions. Saute the mushrooms in 2 tablespoons of butter for 10 minutes until lightly browned and then add to the stew. Bring the stew to a boil on top of the stove, then lower the heat and simmer for 15 minutes. Season to taste.

To serve, toast the bread in the toaster or oven. Rub each slice on 1 side with a cut clove of garlic. For each serving, spoon the stew over a slice of bread and sprinkle with parsley.

Beef Bourguignonne

My Notes: Okay the only thing that didn't work for me was the gravy thickening after I threw in the butter/flour mixture. So what I did was take a ladle full of the thin gravy and mixed it with a heaping tablespoon of cornstarch in a small bowl until it was smooth. Then I poured it back into the pot and continued to cook until the gravy thickened - about 3 minutes.

And my only suggestion for next time would be - unless you are a HUGE pearl onion fan? I'd cut that down to 1/2 pound or even a 1/4 pound - because 1 pound was way, way too many onions. =)


Not only did I choose this recipe to make to christen my sexy hot new Dutch oven, but this recipe also fell right into place when figuring out a weekly meal plan for $40.00 - which just happens to be this month's theme for that sexy thang, Sara's Weekend Cookbook Challenge! How good am I? AND it's an EARLY submission! Let's all wait for Sara to regain her composure and pick her cute lil butt up off of the floor... ... ... ... ... ... ... ... ... ...

Okay! I decided to take this challenge to see if I really could figure out a weekly plan for $40.00 - and if so, then why the hell are my grocery bills so freakin' high?? Well.. I don't think I could do this every week. To come in at $40, we had to eat the Beef Bourguignon two nights in a row. That's something that doesn't happen in my household often. Hubbs is a strict non-believer in left overs. Yeah, he makes not wasting food a bit of an art for me. Thank God for my mommie and my co-workers. *sigh* But this stew was so amazingly good, that he did not complain.

Okay here's my menu:

  • Monday: Chicken wings with peppers, corn and salad. $4.00 (for 2 people - peppers & salad free from garden)
  • Tuesday: Beef Bourguignon with toasted sour dough. $15.00 (for 2 people 2 nights in a row)
  • Wednesday: Beef Bourguignon
  • Thursday: BLT sammiches with sliced cucumbers and chips. $2.00 (for 2 people)
  • Friday: Baked Walleye with onions & spinach, mac & cheese and salad. $4.00 (for 2 people - Walleye free from Lake Erie, onions & salad free from garden)
  • Saturday: Grilled pork shoulder steaks, smashed potatoes and green beans. $7.00 (for 2 people)
  • Sunday: Marinated chicken breast chef salad, bread sticks. $7.00 (for 2 people)

Grand Total: $39.00! Not too shabby, eh? :D

Start looking on WCC and this month's hostess, Cady of $40 a Week's blogs around the 19th for the round up - should be quite interesting to see what everyone's meal plans look like. Also - if you are interested in participating (and you should be!) get your submissions to Cady at "gambini at gmail dot com" on or before Nov. 18th =)

xoxo

Labels: , , ,

Tuesday, November 06, 2007

Drop In and Decorate: Cookies for Donation!

Until just recently, I was not aware of this fabulous way to help those in need.

Lydia of the gorgeous and extremely well written blog, The Perfect Pantry contacted me with all the information.

DI&Dlogoblog

Lydia is the founder of Drop In and Decorate a fun way of getting with friends and family to bake cookies together - and then donate your treats to a local shelter, food pantry, senior center, etc. What I like most about her idea is that it's a win-win situation! You get to be with the people you love, in the place you love the most (the kitchen!) and you get to really be a part of helping someone who is in need.

Sure, cookies won't feed a starving nation - but cookies will brighten up someone's day like nothing else could. The people eating your delicious cookies would appreciate some home baked goodness - it's probably not often that they get such a wonderful gift!

So, I'm delighted to pitch in and write this post, in hopes that the 4 of you who read my blog, will get together with your favorite people, bake up a few batches of cookies and then drop them off where you think they are needed most. I know I'm going to be doing this! I've already asked a group of my favorite girlie girls and we will be baking in the next few weeks. I CAN'T WAIT! It's going to be a blast! And wow.. I just thought of something.. I'll have help cleaning up! WOOOO!! heeee

Hey, here's another terrific thing about Drop In and Decorate - King Arthur Flour Co. is jumping on the bandwagon, too! They are offering a Drop in and Decorate Baking Kit which will make your baking day all that more easy. AND if you order between now and November 15th, King Arthur will include a FREE dough scraper. =)

Add the kit to your shopping cart. On the payment page, enter Promotion Code "Dropin" to the Promotion field and click the Update button. The page will refresh and the dough scraper will be added to your order. Offer valid through November 15 only (but the kit is on sale until December 26, and would make a great holiday gift).

C'mon kids.. get your friends/family over and do a lil baking for charity! And hey.. if schedules don't mesh and your weekend to bake isn't great for anyone else, go ahead and Drop In and Decorate yourself - nothing wrong with that at all! =)

Ohhh one more wee thing.. I found this myself while reading Lydia's Nine Cooks website. There is an artist in Providence, Rhode Island, named Shawn Kenny who paints extremely gorgeous food themed paintings. They are fabulous - you must go look! If you happen to fall in love and purchase one, part of the proceeds go to agencies who are helping to fight hunger.

Hugs!
xoxo

Labels: , , ,